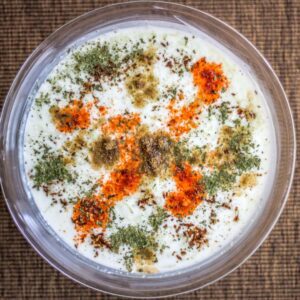
Banana Raita, also known as Kele Ka Raita, is a delightful Indian side dish that combines the sweetness of ripe bananas with the creaminess of yogurt. This refreshing raita is not only easy to prepare but also offers a unique twist on traditional raita recipes. It serves as a perfect accompaniment to spicy Indian dishes, balancing flavors and providing a cooling effect. Additionally, Banana Raita can be enjoyed as a light dessert or snack, making it versatile for any meal.
Ingredients for Banana Raita
To prepare Banana Raita, you will need the following ingredients:
Main Ingredients
- 2 cups plain yogurt (curd): Use thick yogurt for a creamy texture.
- 2 ripe bananas: Slightly overripe bananas work best for sweetness.
- 2 tablespoons sugar (optional): Adjust according to taste.
- 1 tablespoon chironji (optional): Adds a nutty flavor and crunch.
- 8-10 crushed cashew nuts: For added richness and texture.
- 10-12 raisins: To enhance sweetness and chewiness.
- ½ teaspoon cardamom powder: For aromatic flavor.
- ½ teaspoon rose water (optional): For a floral note.
- Salt to taste: To balance flavors.
Optional Ingredients
- Chopped almonds or pistachios: For extra crunch.
- Fresh mint leaves: For garnish and freshness.
- Dried rose petals: For decorative garnish.
Step-by-Step Preparation
Step 1: Prepare the Yogurt Base
- In a mixing bowl, take 2 cups of plain yogurt. Ensure it is fresh and not sour.
- Whisk the yogurt until smooth and creamy using a wire whisk or electric mixer.
Step 2: Add Sweeteners and Spices
- Add sugar (if using) and mix until fully dissolved in the yogurt.
- Stir in the cardamom powder for flavor enhancement.
Step 3: Prepare the Bananas
- Peel the bananas and slice them into small rounds or mash them coarsely using a fork or potato masher.
- If you prefer chunks, cut them into bite-sized pieces.
Step 4: Combine Fruits with Yogurt
- Gently fold in the sliced or mashed bananas into the yogurt mixture.
- Add chironji, crushed cashew nuts, raisins, and mix well without mashing the bananas.
Step 5: Finishing Touches
- If desired, add rose water for an aromatic touch.
- Taste and adjust sweetness or salt according to preference.
Step 6: Chill and Serve
- Cover the bowl with plastic wrap or a lid and refrigerate for at least 30 minutes before serving.
- Serve chilled in individual bowls or as part of a larger meal spread. Garnish with additional nuts or dried rose petals if desired.
Nutritional Benefits of Banana Raita
Banana Raita is not only delicious but also packed with nutritional benefits:
- Rich in Probiotics: Yogurt is an excellent source of probiotics that promote gut health and improve digestion.
- Vitamins and Minerals: The combination of bananas provides essential vitamins such as Vitamin C, B6, potassium, and dietary fiber.
- Low in Calories: When made with minimal sugar, Banana Raita can be a low-calorie option that satisfies sweet cravings without excessive calories.
Variations of Banana Raita
While traditional Banana Raita is delightful on its own, there are several variations you can try:
Nutty Banana Raita
Add chopped nuts such as almonds or walnuts for extra crunch and nutrition.
Spicy Banana Raita
Incorporate finely chopped green chilies for a spicy twist that contrasts with the sweetness of bananas.
Tropical Fruit Raita
Mix in other fruits like mangoes or pineapples along with bananas for a tropical flavor profile.
Vegan Banana Raita
Substitute regular yogurt with coconut yogurt or almond yogurt for a vegan-friendly version.
Serving Suggestions
Banana Raita pairs beautifully with:
- Spicy Indian curries like Paneer Tikka Masala or Chole Bhature.
- Biryani or Pulao dishes as a cooling side dish.
- As a light dessert after meals.
Tips for Perfecting Your Banana Raita
- Use Fresh Fruits: Always opt for fresh bananas that are ripe but not overly soft for the best flavor and texture.
- Thick Yogurt: Use thick yogurt for creaminess; you can strain regular yogurt through cheesecloth if needed.
- Adjust Sweetness: Customize the sweetness according to your taste; some may prefer it sweeter while others may like it tangy.
- Serve Immediately: For best results, serve immediately after mixing to avoid fruit oxidation.
FAQs
What exactly is Banana Raita?
What are the key ingredients?
What kind of bananas work best?
How is Banana Raita made?
How can I keep the bananas from turning brown?
What are some fun variations I can try?
What foods go well with Banana Raita?
Can I make a vegan version?
How should I store leftover Banana Raita?
What are the health benefits of Banana Raita?
Conclusion
Banana Raita is a remarkably simple and refreshing dish that offers a delightful balance of sweet and savory flavors. Its versatility makes it a wonderful accompaniment to a variety of Indian meals or a light snack on its own. Feel free to experiment with different spices and seasonings to create your perfect version. Whether you’re looking for a quick and easy side dish or a healthy and flavorful snack, Banana Raita is a great choice! So, give it a try and enjoy the deliciousness!
